Listen to my interview with Justine Bruyère (transcript):
Sponsored by Teaching Channel and Wipebook
This post contains Amazon Affiliate links. When you make a purchase through these links, Cult of Pedagogy gets a small percentage of the sale at no extra cost to you.
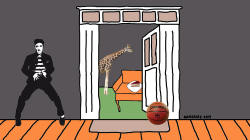
Shilpa stands in front of a mountain range, arms extended. A few seconds later, she’s transported to a city street. Look again and she’s swimming in the ocean. Finally, she’s floating through outer space.
These rapid trips around the universe are happening thanks to the magic of green screen technology, and to take them, Shilpa never once left her classroom in Nashville.
Green screen technology (also known as chroma keying) offers so many engaging opportunities for students to learn. It’s pretty easy to do, it can be done on a very low budget, it works in lots of subject areas and grade levels, and it’s even possible while teaching remotely. In my most recent podcast interview (listen or read the transcript above), I talked with teacher educator Justine Bruyère about the why and the how of green screen videos.

How Do Green Screens Work?
A solid green screen is placed behind the subject of the video, which in many cases is a person. Once the initial filming has been done, special software allows the video editor to replace everything that appears green on the video with a still image or another video.
This video explains the process:
Why Use Green Screens?
Far from being just a cool novelty, green screen projects have the potential to give students deep, creative learning experiences. Bruyère points out a few key characteristics that make projects that use this technology so special:
- They generate embodied learning. When students put themselves into green screen projects—whether it’s to take on the role of a character in a book, a journalist, an investigator, or an explorer—their bodies and emotions are actively participating in the learning process, which deepens the learning. This mind-body connection is at the heart of the embodied learning approach, which posits that the brain is activated by physical movement.
- They lend themselves to inquiry. If they are well-designed and give students autonomy and choice, green screen projects are perfect for inquiry learning, where students do their own research and problem-solving around big questions they’re naturally interested in. This kind of work is much more engaging than what we typically see in traditional classrooms. “We’re moving away from (tasks) where teachers give the problem to the students and students fill out the single right answer. We’re kind of moving more into sociocultural perspectives where students have buy-in, where they’re excited about the work, where they’re choosing pathways that are truly interesting to them,” Bruyère says. “You don’t ever have to say, The paper has to be three pages long, or You need to talk for at least two minutes, or I want to hear your voice like you mean it. All of those things happen naturally.”
- They are social. Bruyère believes that socially constructing knowledge—sharing learning and knowledge in community—is fundamental to growth, solidification of understandings, and the formation of new curiosities. If your classroom culture allows for collaboration, green screen projects are a great fit. “Students are talking about the tool they’re using, how they’re using it, what they did,” she says. “They’re conversing about how they might best reach their audience. They’re considering the choice that they have and where they might stand or how they might speak and that execution.”
- They are often cross-curricular. All green screen projects incorporate reading, writing, drama, music, and often at least one other subject area, such as social studies or science.
How to Do a Green Screen Project: Equipment and Tech
For any green screen project, the following components are needed:
- an actual green screen: This is set up behind students as they do their recording.
- a recording device: The easiest option would be a smartphone or tablet.
- green screen software: These apps let you take an existing video filmed with a green screen, then add a new background. For use with students, Bruyère recommends Chromavid and Green Screen by Do Ink.
Because many of us are currently teaching in remote or hybrid situations, we’ll look at two ways to do this: at home with limited space and little to no budget, or at school with a little more space and slightly bigger budget.
Home Option: Limited Space, Low-to-No-Budget
- Use one 8.5 x 11″ piece of green paper (or a few pieces taped together) as the green screen background.
- Have students draw characters to “act” in the video. This is necessary because the size of the screen won’t be big enough to accommodate full-sized, human actors.
- Students can record the video on any device and send it to the teacher with instructions for the background image, which could include images drawn by the student.

School Option: More Space, Bigger Budget
At school, you’ll likely be able to give students access to devices that already have the green screen app loaded, so students will be able to record and edit their videos themselves.
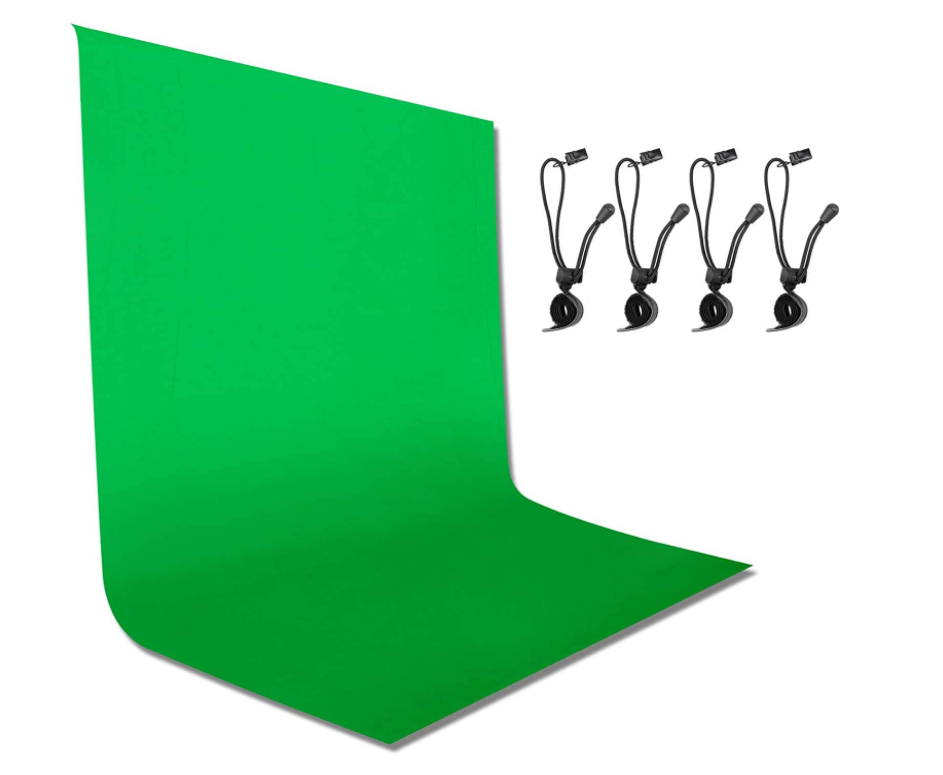
As for the screen, you can still use the green paper option, or look for green tablecloths from a dollar store. If you have a little more money to spend, you could get something designed specifically for this purpose. This backdrop can be hung quickly with the included clips, then taken down when not in use:
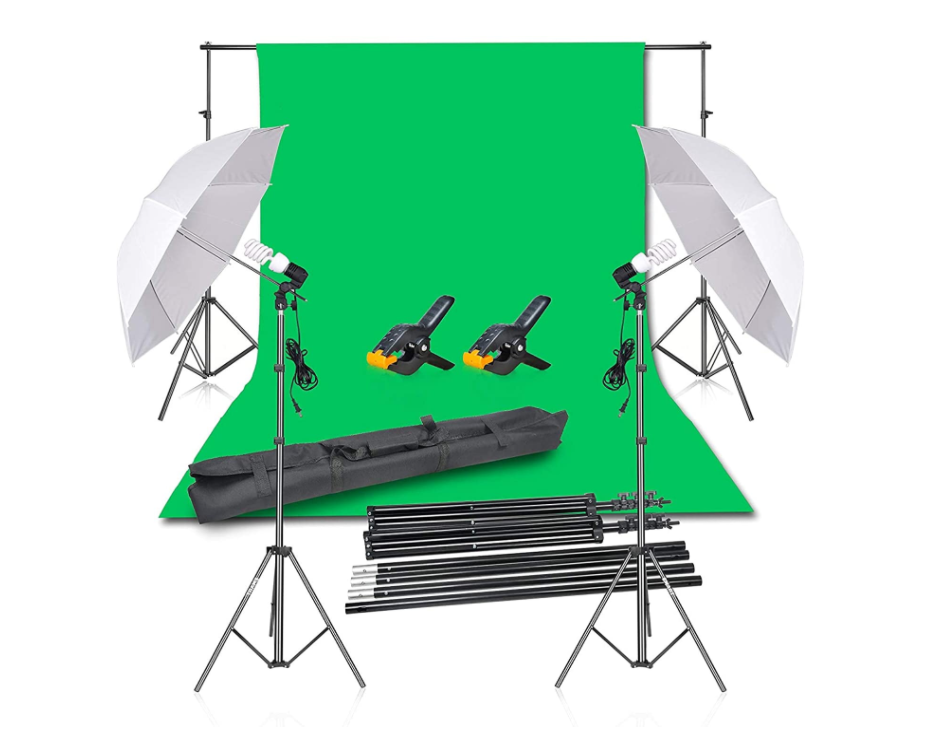
If you have space to set up a green screen studio or area, you might want to spring for a full setup like this one that includes a screen, stand, and lights:
How to Do a Green Screen Project: The Process
When Bruyère conducts a green screen project with students, the project loosely follows these three phases:
Phase 1. The Set-Up
Start by modeling use of the green screen app for students. Bruyère will typically create a low-stakes video with students, where she models both how to use the app and her creative process: how the concept is developed, what happens if she makes mistakes, and how she makes improvements and revisions. Because she goes back to the video several times to make changes and improvements, this phase lasts several days. “Just like in a writer’s workshop model,” Bruyère says. “I consider the green screen a form of authoring, a form of writing.”
Phase 2. The Mess
Students now begin working on their own projects. This process will be time-consuming and messy by design, and to someone passing by your classroom, it may look like things are a little out of control. But this ‘productive struggle,’ as Bruyère calls it, is necessary.
“Trust that mess,” she says. “they’re striving. They’re learning. They’re talking to one another, overcoming. And that is just such a beautiful thing because when a teacher dives in, when we solve the problem, we are taking away all the learning from the students. We’re robbing them of that valuable learning that they can transfer to other domains in the future.”
Phase 3. The Growth
As students complete their projects, they begin to grow in their understanding of the technology and its possibilities. As you offer opportunities for subsequent projects, you can also share ideas for growth, ways students can stretch into more advanced skills:
- Using moving backgrounds
- Enlarging people
- Enlarging objects
- Making students float or fly
- Adding additional image boxes
- Duplicating people
- Blending two applications, like posting the video in a Book Creator shareable story
Ideas for Green Screen Projects
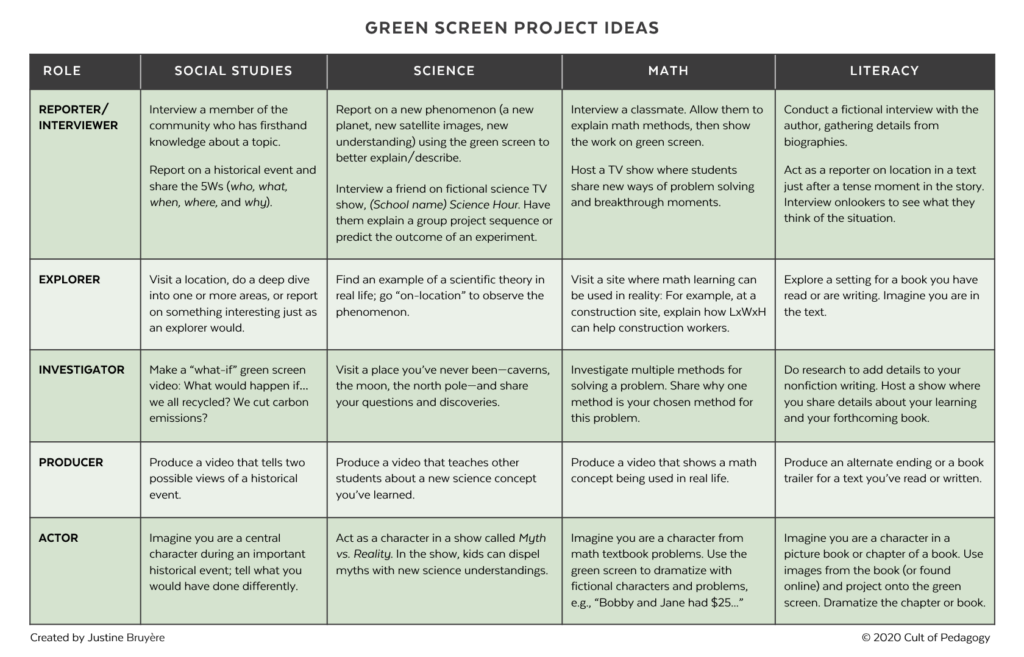
The possibilities for projects are extensive and reach across many content areas. Here are just a few for social studies, science, math, and ELA:
At a time when actual travel has become a near impossibility, green screens offer a way for us and our students to keep exploring the world, answering big questions, and stretching ourselves creatively. Consider making them an option for your next classroom project and see what happens.
Join our mailing list and get weekly tips, tools, and inspiration that will make your teaching more effective and fun. You’ll get access to our members-only library of free downloads, including 20 Ways to Cut Your Grading Time in Half, the e-booklet that has helped thousands of teachers save time on grading. Over 50,000 teachers have already joined—come on in.




Wonderful article!
A cheap method that’s likely to be used more than others is to paint a wall green. Works really well!
Also, iMovie has great Green Screen features.
Thanks for sharing this great starter guide!
Here’s another exercise that will strengthen students’ visual awareness and creativity; lighting. Have students try to emulate the lighting used in the background source. They will learn to think about light in new ways; softness, color, distance, etc. Also, bring the green screen outside and use natural light. This is a common technique used in commercial and feature work.
Cheers.
Just. Quick question…I saw a green screen video where the kids were inside their project- sitting on a log and talking about the location- if the green screen goes on the floor and in the background- how do you put the picture on the floor part and flip it so it looks like the kids are standing inside the project or in the country etc.
Hey there,
Great question. Firstly, it’s a good idea to just play with Green Screen by DoInk to start your learning. This play will help you to visualize how layers work within the app.
Next, I would suggest using a specific camera angle for this sort of video shot. If the camera operator is standing on a stool, the shot will benefit from a birds-eye-view. Then, place the photo of the student’s assignment (a log in your example) in one of the layers. Now, you can adjust how big or small the student is within the image.
Finally, as you do this “messy” work, it’s helpful for students to take part in the learning with you. Students frequently surprise me with their findings and ideas.
Here is an example: https://twitter.com/DoInkTweets/status/1122109799506874368
I hope this helps!
Justine
Our Talented and Gifted Program has been trying to train us for a green screen and software project. Then the students had to stay home for distance learning and everything came to a halt. This blog is giving me a lot of ideas on how the students can do it on their homes! I find the chart for project ideas would be great for choice boards and cross-curricular application.
With what you have said “At a time when actual travel has become a near impossibility, green screens offer a way for us and our students to keep exploring the world, answering big questions, and stretching ourselves creatively.” , This is a great go to activity for their International Language and Culture Elective! I bet they would get very creative in showing everybody a report on Japan, with them in it!
Thank You
Priscila
I like that you mentioned that a green screen will give students the opportunity for inquiry learning. My sister-in-law is a middle school photography teacher and she has been having such a hard time with teaching online. I am going to send her this article and maybe it will give her some new inspiration for how to keep her student engaged.
So many great ideas. I am so excited to get my class involved in being creative and taking a chance and jumping in. We are going to get started with our topic of weather and have our own news/weather report. Thank you for so many great possibilities to try out.